Industries
Audio Metry Test (AMT) Solution
The Audio Metry Test (AMT) solution is an independent desktop application, designed for the healthcare industry, that helps otolaryngology (Ears Nose and Throat – ENT) doctors and audiologists to study auditory thresholds on patients. It represents an analogue to specialized medical electronic equipment, that has a very intuitive interface, enabling doctors to carry out medical examinations without any pre-training.
The outer, middle and inner ear play an important role in sending audio information to the brain. Damages in one or several ear parts can cause loss of hearing. Type and severity of the hearing loss can be determined by measuring the patient’s hearing with the AMT solution and assigning the results into one of the following categories:
- 0-10 dBHL – normal hearing
- 20-30 dBHL – slight hearing loss
- 40-60 dBHL – average hearing loss
- 70-80 dBHL – severe hearing loss
The test is performed in the following steps:
- Run the desktop application and place headphones on the patient’s head. Press the ‘Calibration’ button (Fig. 1) and ask the patient about the type of noises he/she hears. By playing predefined sounds or optionally chosen music files and asking the patient about them, the doctor examines whether the patient’s response is adequate or not.
- After the Calibration-phase, start testing the right ear by pressing the buttons on the screen, starting in the upper left corner (125 HZ/0 DBHL, lowest level of sound) and continuing horizontally to the right, until each button in the table has been tested. As soon as the patient starts hearing noises (first only in his right ear), select the results from the dropdown menu, located in the grid in the lower center (for ex. 10 for 10 DBHL). After all 7 spaces in the grid have been filled with numbers, press the button ‘End the test and record’. The results from the right-ear test will be exported in a diagram (Fig. 3).
- Repeat the steps above to check the patient’s hearing on the left ear. Press the button ‘End the test and record’ to export the results for the left ear as well (Fig. 3).
- Fill in the form with the patient’s data and draw your conclusion based on the test results (Fig. 4).
- Print out and sign the results by pressing the button ‘Results and Printing’ (Fig. 5).
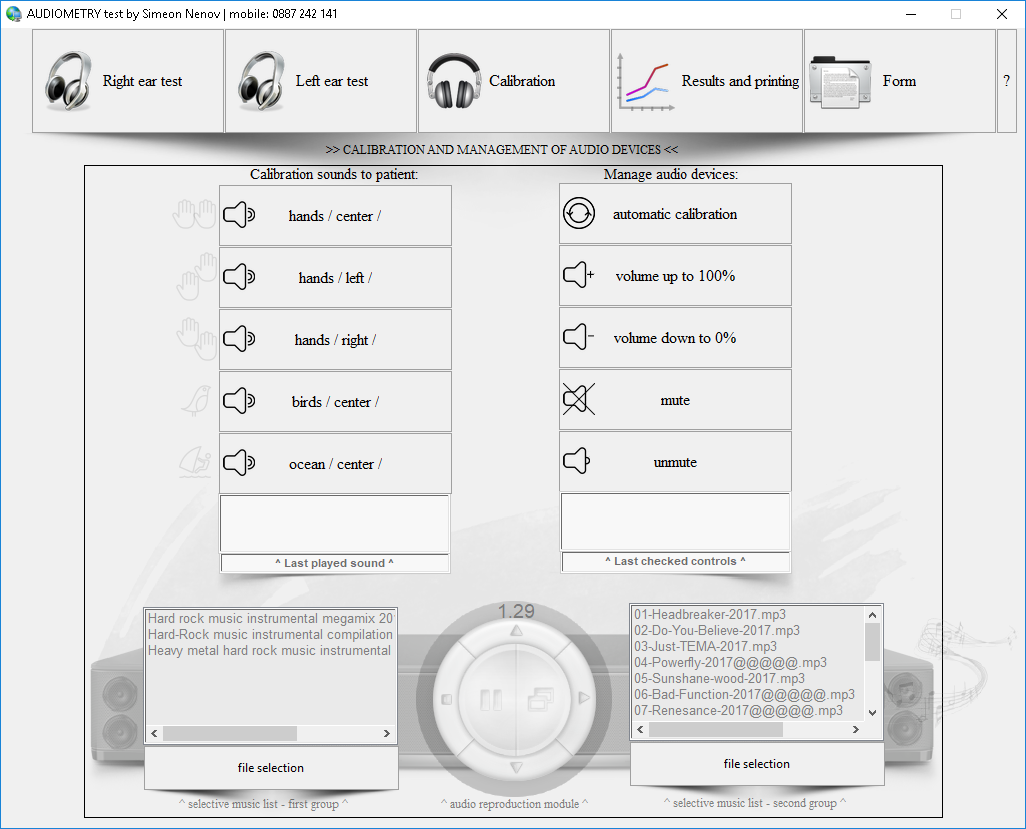
Fig. 1. Start with the Calibration.
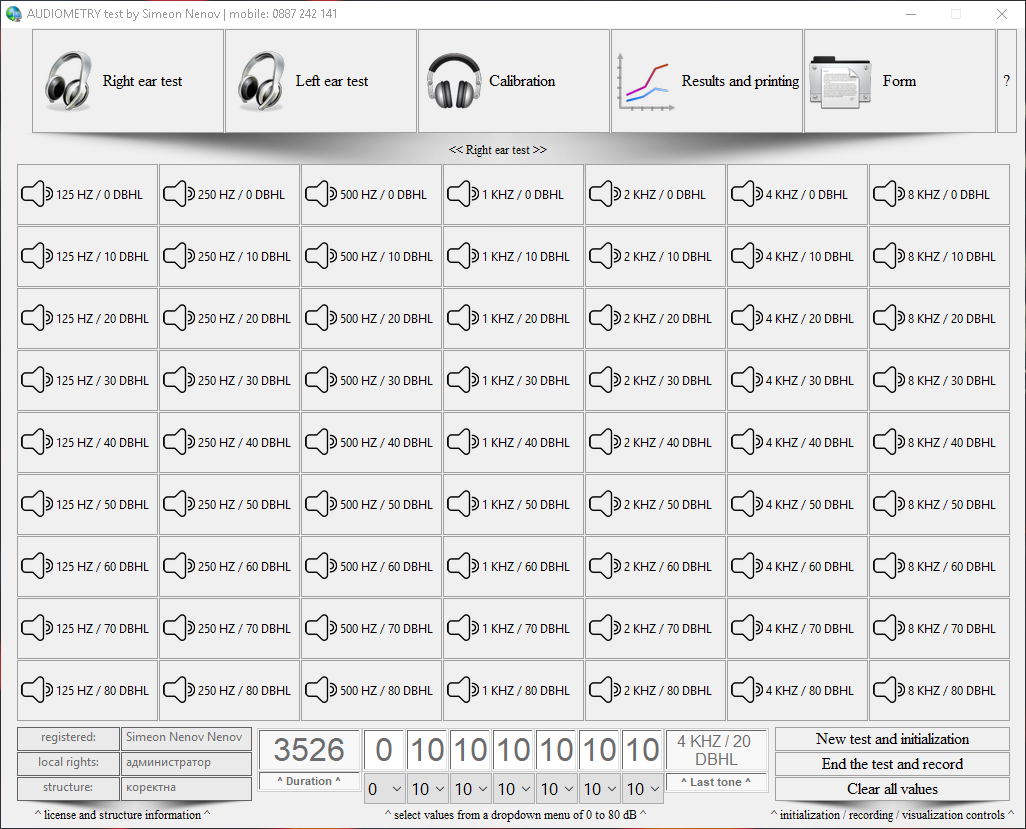
Fig. 2. First perform the right-ear and then the left-ear test.
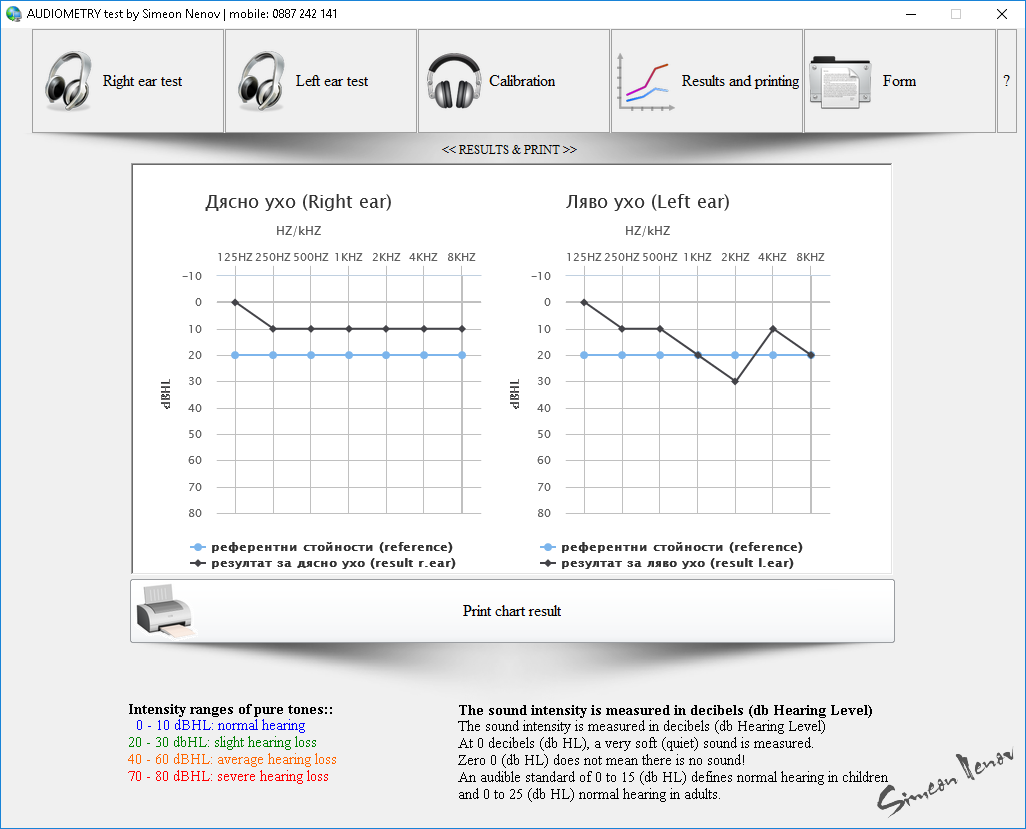
Fig. 3. Test results are displayed in the form of a diagram.

Fig. 4. Example of a form with patient´s data.

Fig. 5. Example of test results in print form.
Further, Eurorisk Systems provides the GRAPHICS PROCESSING UNIT (GPU) solution, based on Risk Framework, which can discover breast cancer cells through 3D graphics of a human breast.